A Beginner’s Guide to the WordPress Dashboard
WordPress
is a fantastic tool for content publication and management, but the
platform can be intimidating for new users. If you’re using the Content
Management System (CMS) for the first time, you may be taken aback by
the sheer volume of options available within the WordPress dashboard.
While the dashboard may appear complex at first, things get less intimidating once you get to know its main components. Additionally, studying each widget area and sidebar tab individually will get you a long way towards understanding the platform.
In this guide, we’re going to deconstruct each section of the WordPress dashboard and arm you with the knowledge necessary to master the CMS. Let’s take it from the top!
Before we dive in, please note this tutorial and all screenshots within were taken from WordPress version 4.7, released on December 6, 2016. If you’re reading this somewhere down the line, some sections might have changed in the meantime.
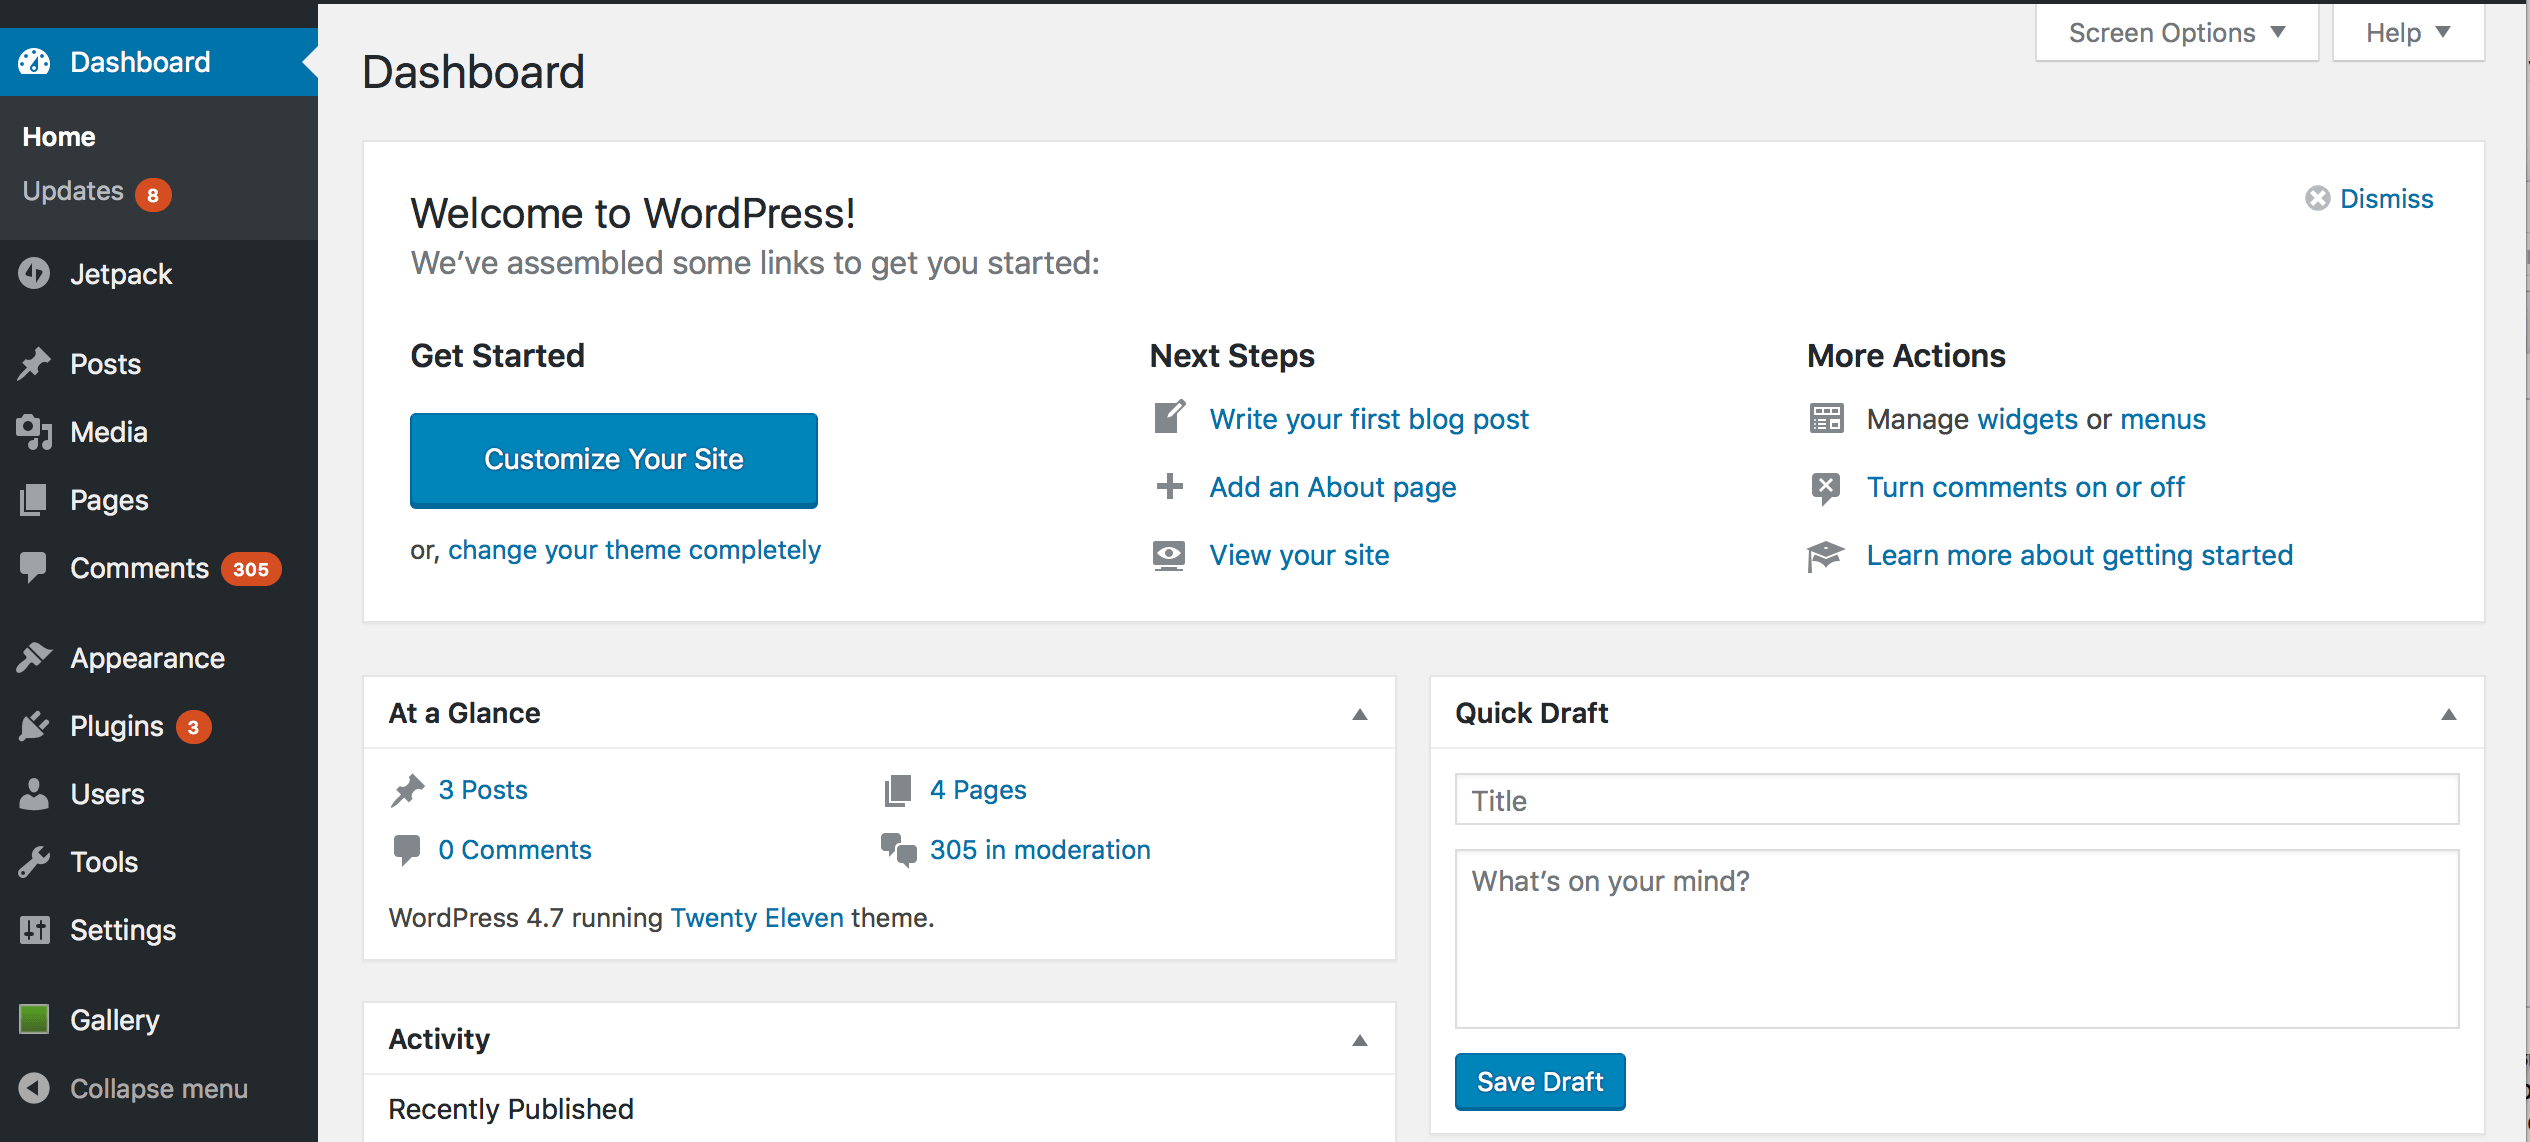
Upon logging into WordPress, you’ll find that your dashboard is full of widgets, boxes, menus, and tabs. These elements are divided into two distinct “zones” – the main dashboard area in the center of the screen, and the sidebar to the left. Let’s go over the main area first.
This area takes up the most real estate by far, and it’s made up of several widgets offering different features. The first is the Welcome widget.
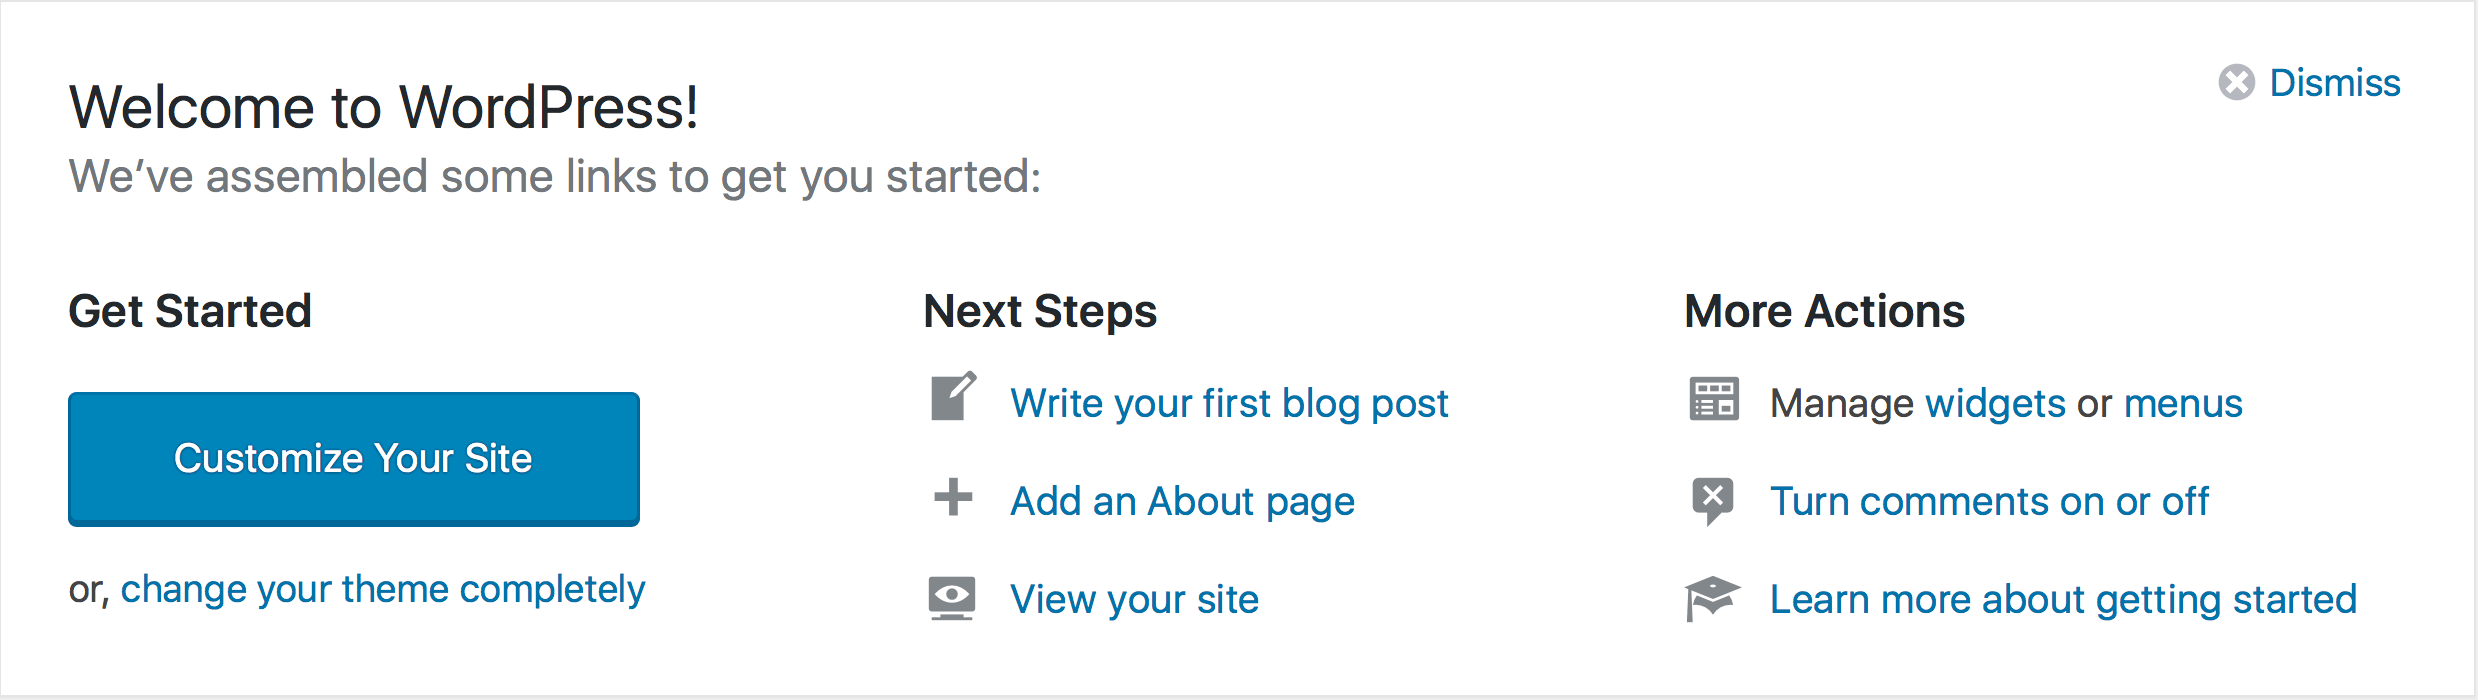
The Welcome widget is located at the top of the main dashboard area. It invites you to jump right into blogging, with direct links to create your first blog post, add an About page, or preview your site. This section also includes links to a WordPress tutorial for newcomers, toggling comments on or off, and customizing your widgets and menus.
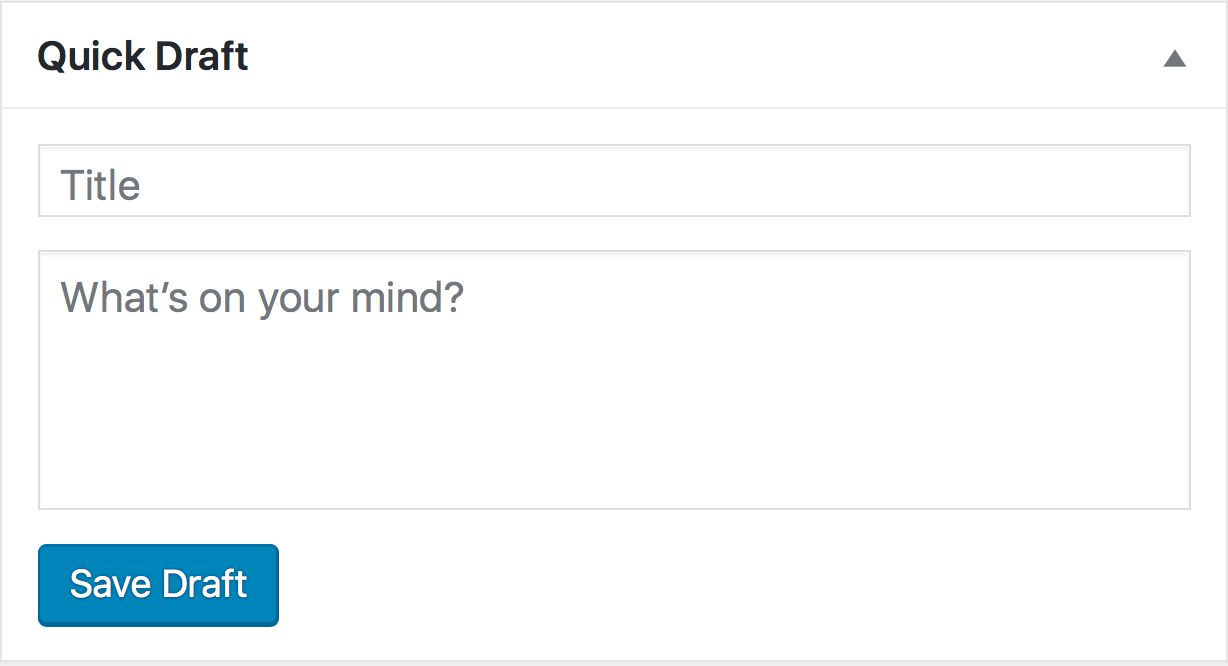
The Quick Draft widget delivers exactly what its name implies – it enables you to get a new post started right away. It can be useful if you’re ever in need of firing off a quick update, but it lacks all the advanced functionality of the WordPress editor, so we wouldn’t recommend using it for a full-fledged post.
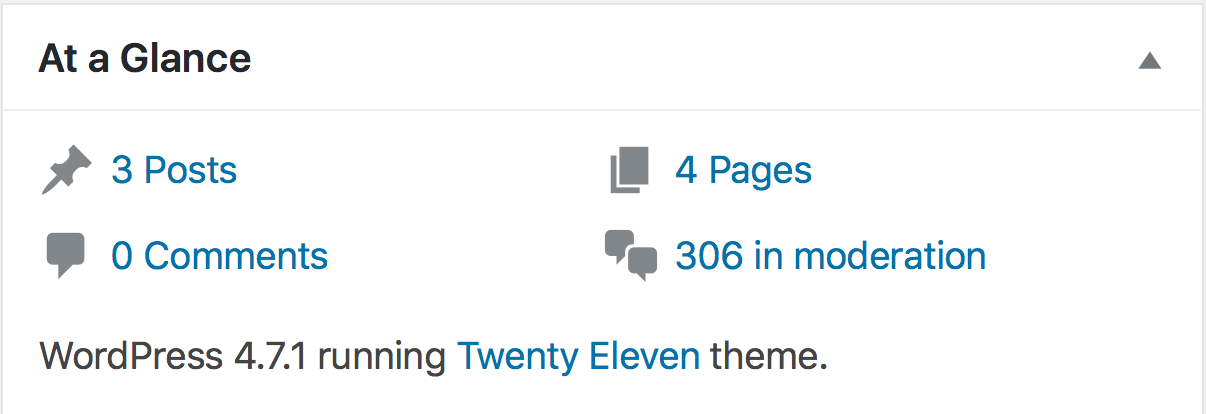
If you want a bite-sized summary of your most relevant blog stats, the At a Glance widget is the perfect solution. This section displays the number of posts you’ve published, how many pages your site has, the number of overall comments, and how many are waiting for your approval.
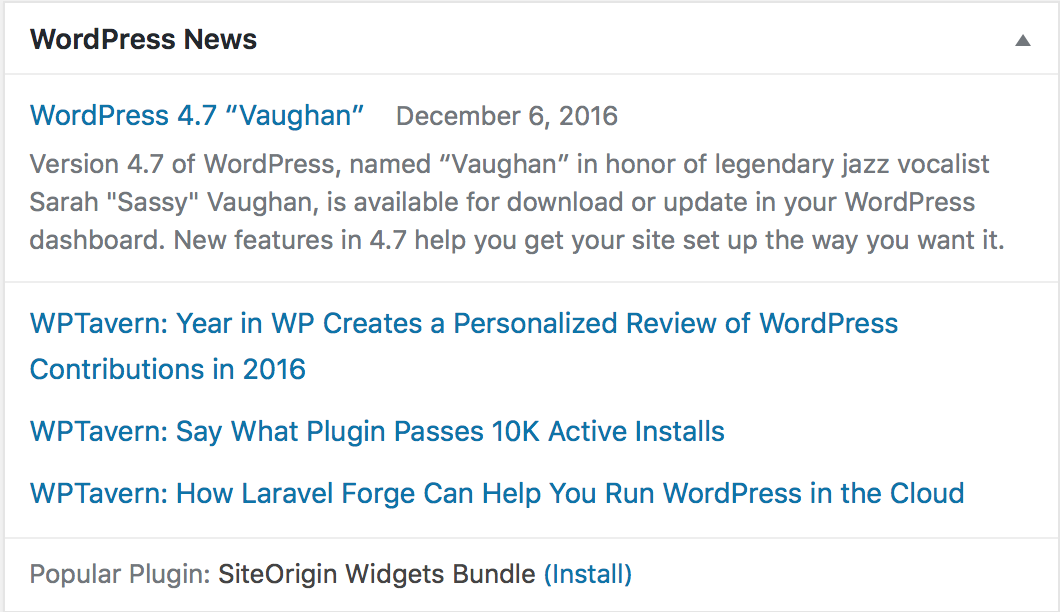
True to its name, the WordPress News widget rounds up links to the latest developments for the CMS. It’s the perfect way to stay on top of the most recent events concerning the platform.
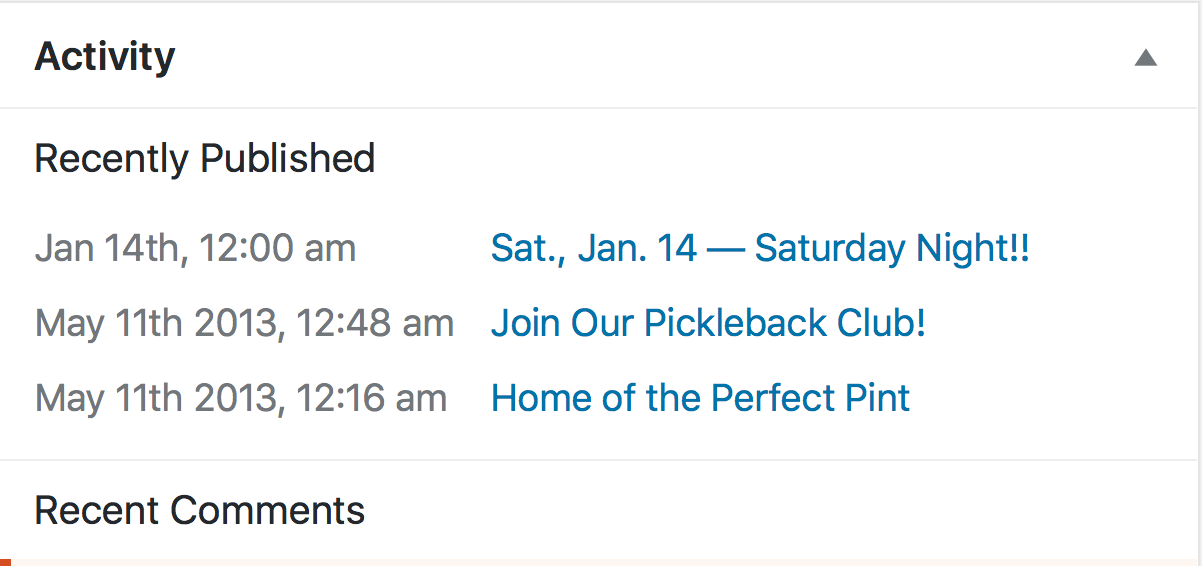
The Activity widget displays the most recent activity from you, all members of your staff, and any visitors. By default, the Activity widget will show your website’s most recent posts and any new comments within.
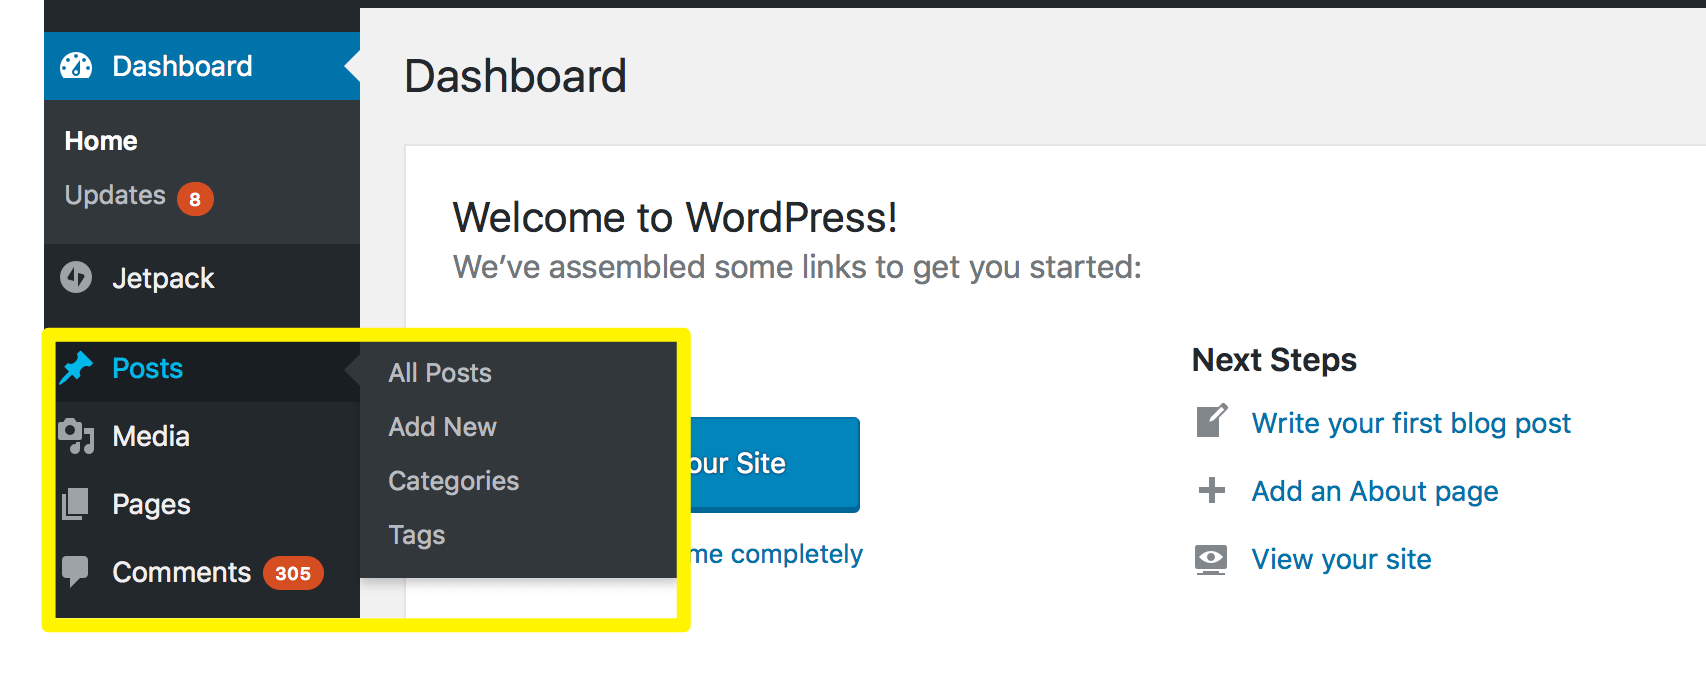
The Posts, Media, Pages, and Comments tabs cover some of WordPress’ most critical features, and you can find all of them at the top of the sidebar. Each of these tabs is fairly self-explanatory. For example, you can click Post to see a listing of all your existing pieces and add new ones – same for Pages.
What’s the difference between a post and a page, you ask? Simple. Posts are meant to come and go, disappearing off your site’s homepage as they grow older and are replaced with fresh content. Conversely, pages are permanent features of your website. For example, this piece was created using WordPress’ Posts tab, whereas the Themes link at the top of your screen will take you to a permanent page. (The above isn’t a complete definition, but certainly good enough to be getting started with.)
Finally, we arrive at the Comments and Media tabs. The Comments section enables you to oversee and moderate user comments, while the media tab leads to a library of all your content, including photos, video, and audio.
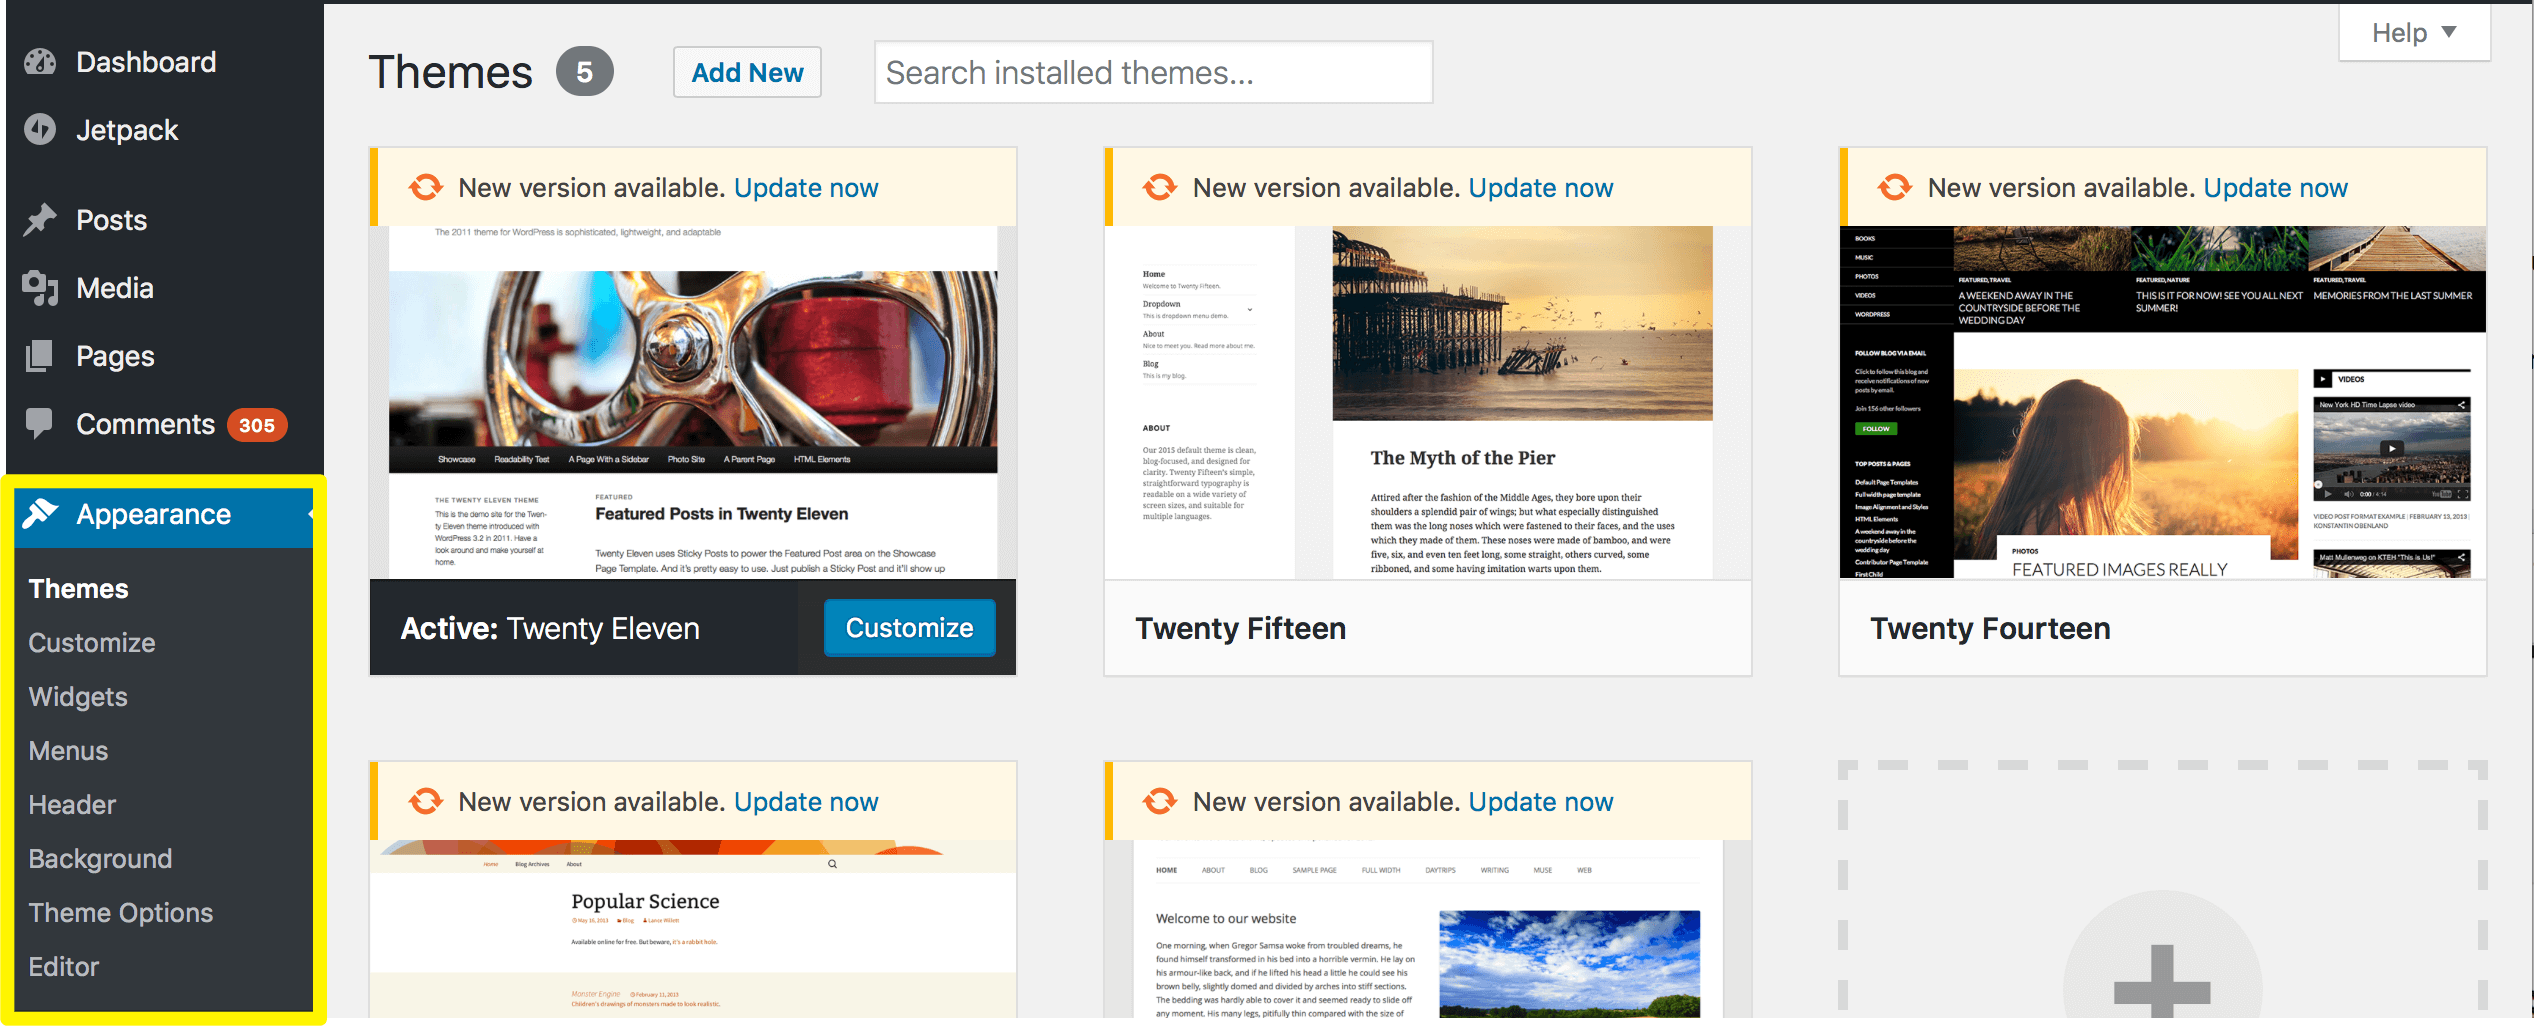
The Appearance tab leads to a menu that enables you to manipulate the look of your WordPress site through several features. First of all, you can switch between WordPress themes here, most of which can have an enormous impact on both your site’s style and functionality. The Appearance panel enables the discovery, activation, and customization of both free and premium themes. If you want to learn more about how to add and use themes, check out this excellent tutorial.
Furthermore, the Appearance tab also enables you to edit your website’s main menu, and add new widgets to your pages.
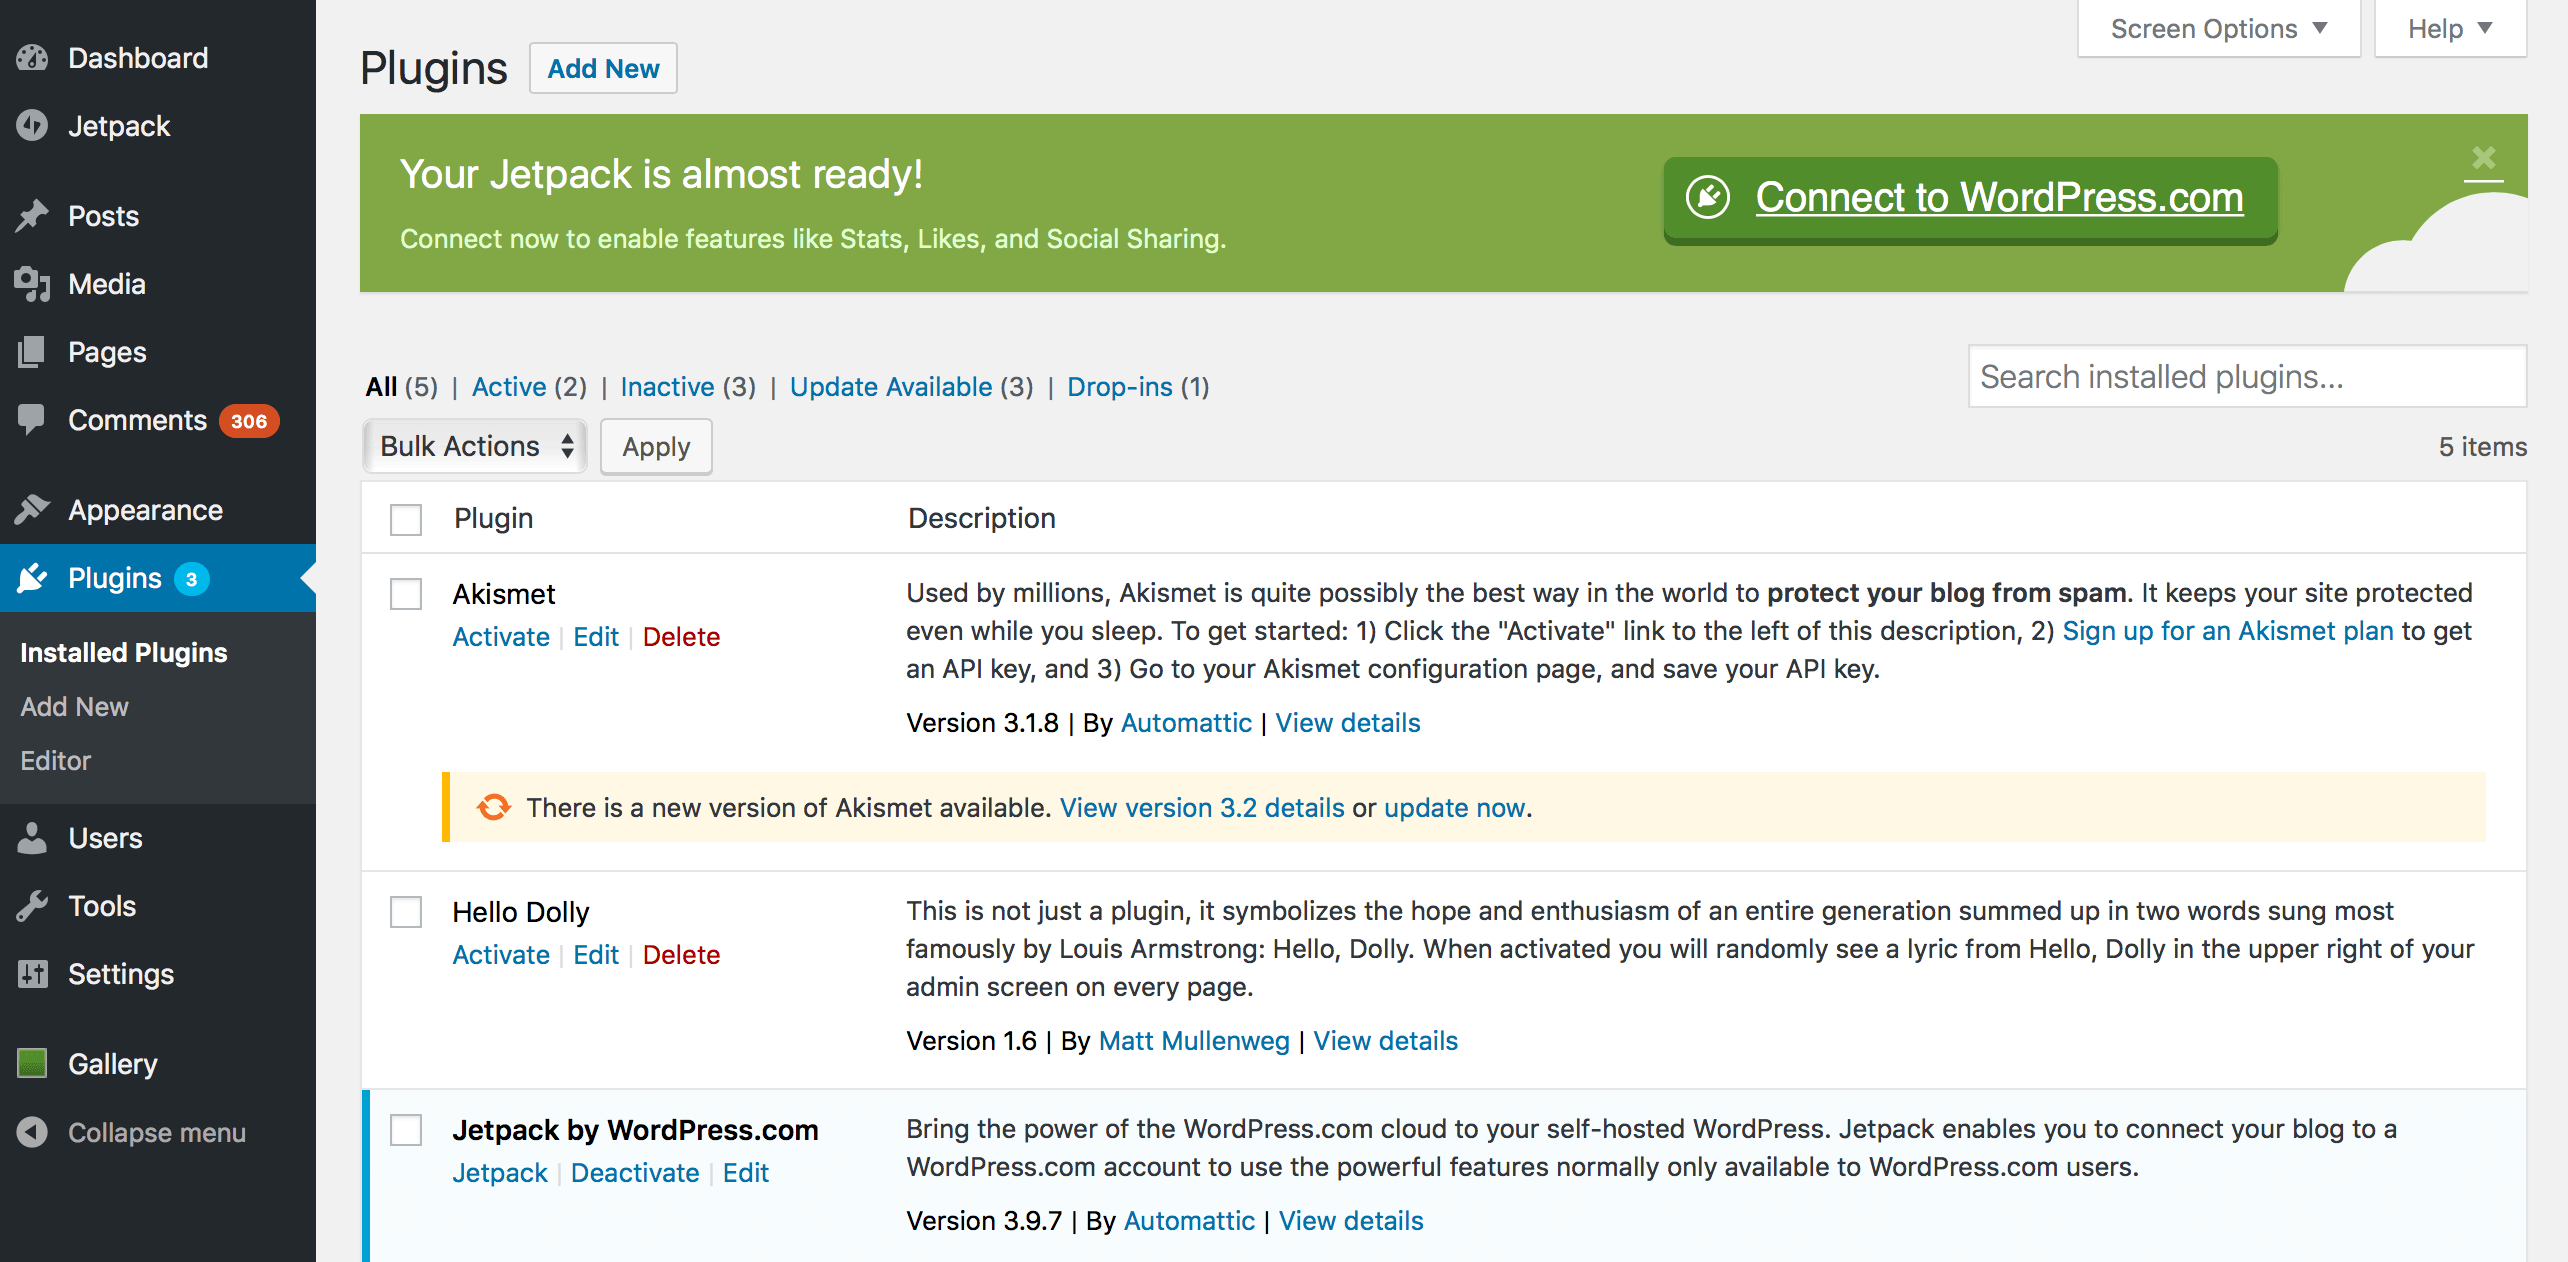
To put it simply, plugins are tools that extend WordPress’ functionality. This tab enables you to add, delete, activate, and deactivate them as you will.
WordPress was designed to be lean and mean out of the box, which is what makes plugins so useful. It’s a modular system that enables you to enhance your site in any way you see fit, from compressing images, to improving Search Engine Optimization (SEO). If you’re not sure where to start looking for plugins, check out WordPress’ official repository.
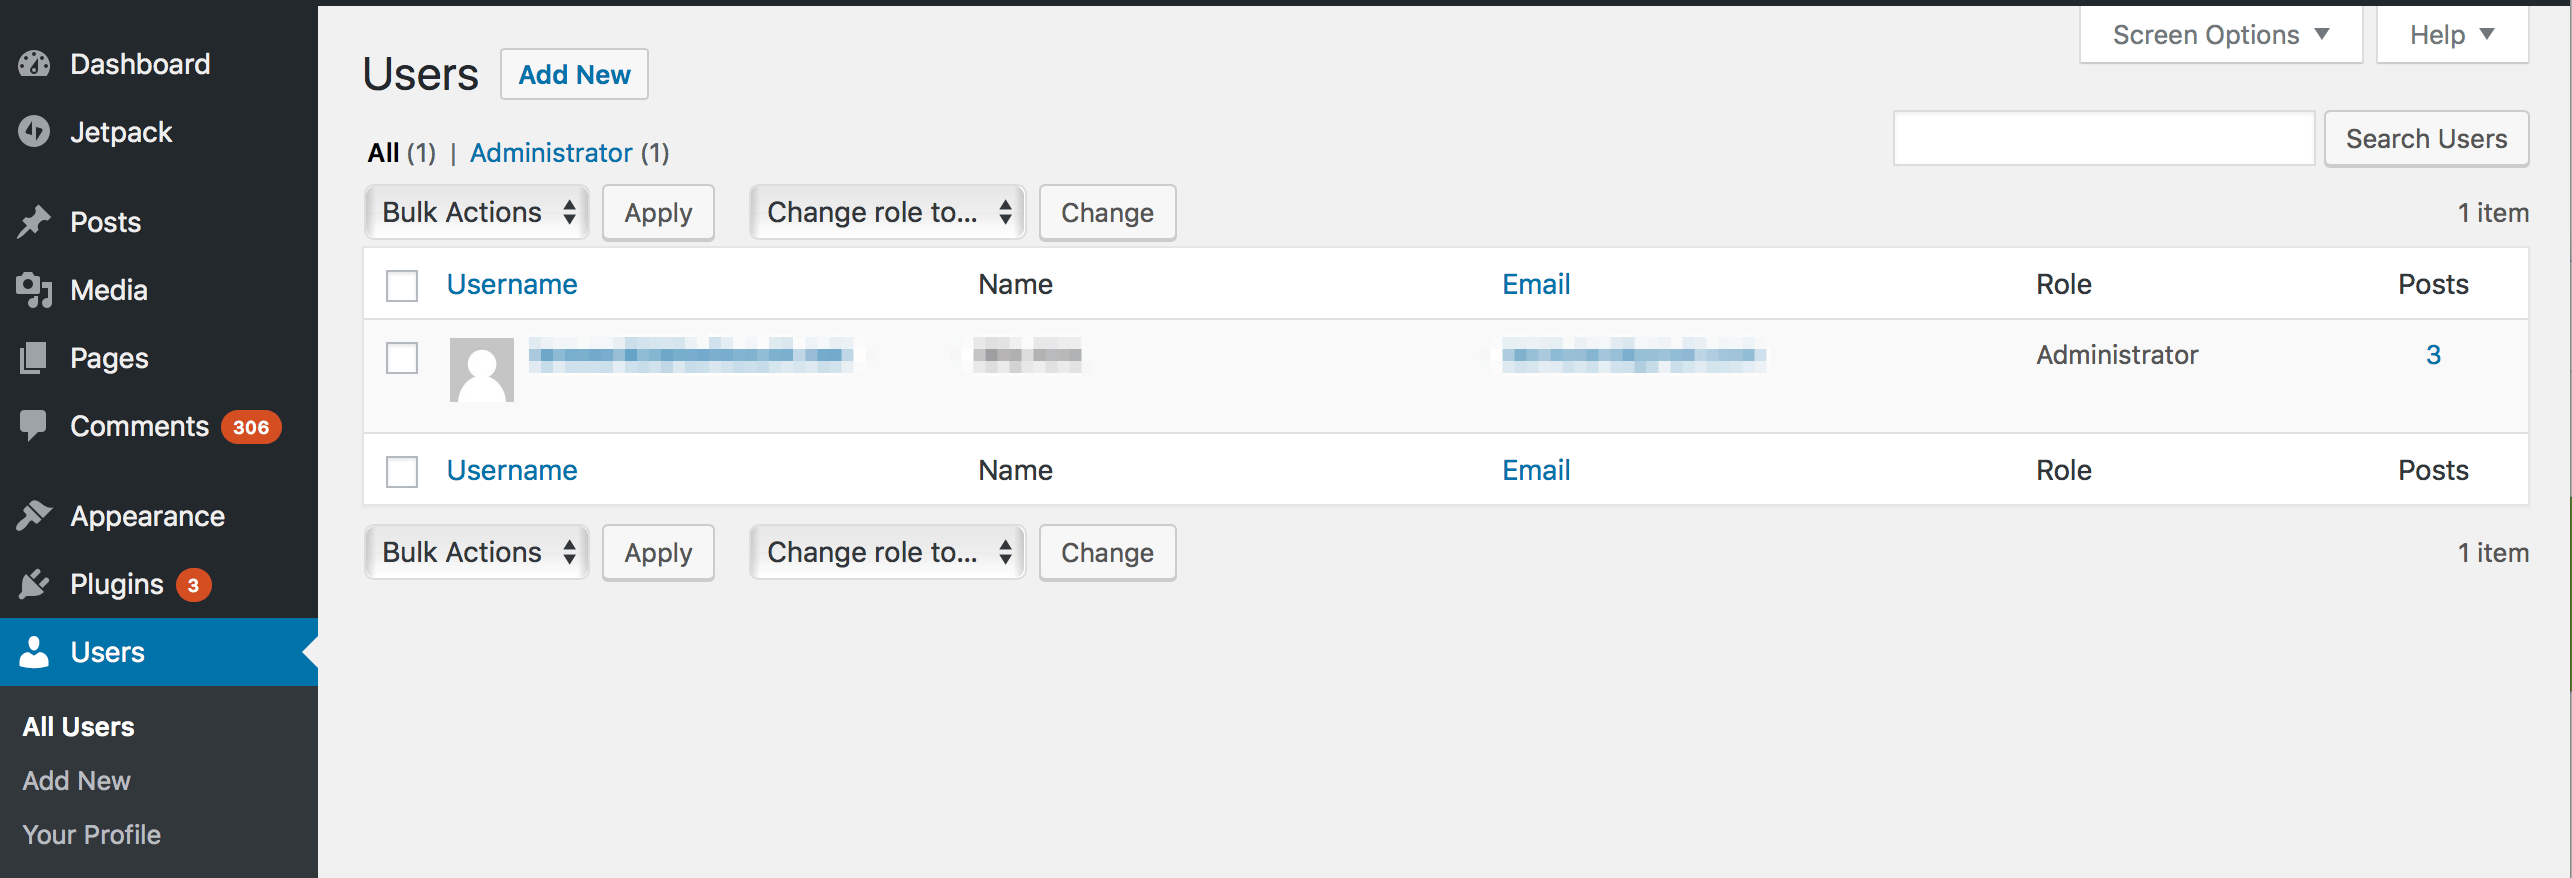
This WordPress tab enables you to manage existing users and add new ones. Subscriber, Contributor, Author, Editor, and Administrator user roles are included by default and can be granted to anyone at your discretion.
Bear in mind that any additional administrators (aside from you) will have full access to all the site’s features, so think it over carefully before assigning this role to any user!
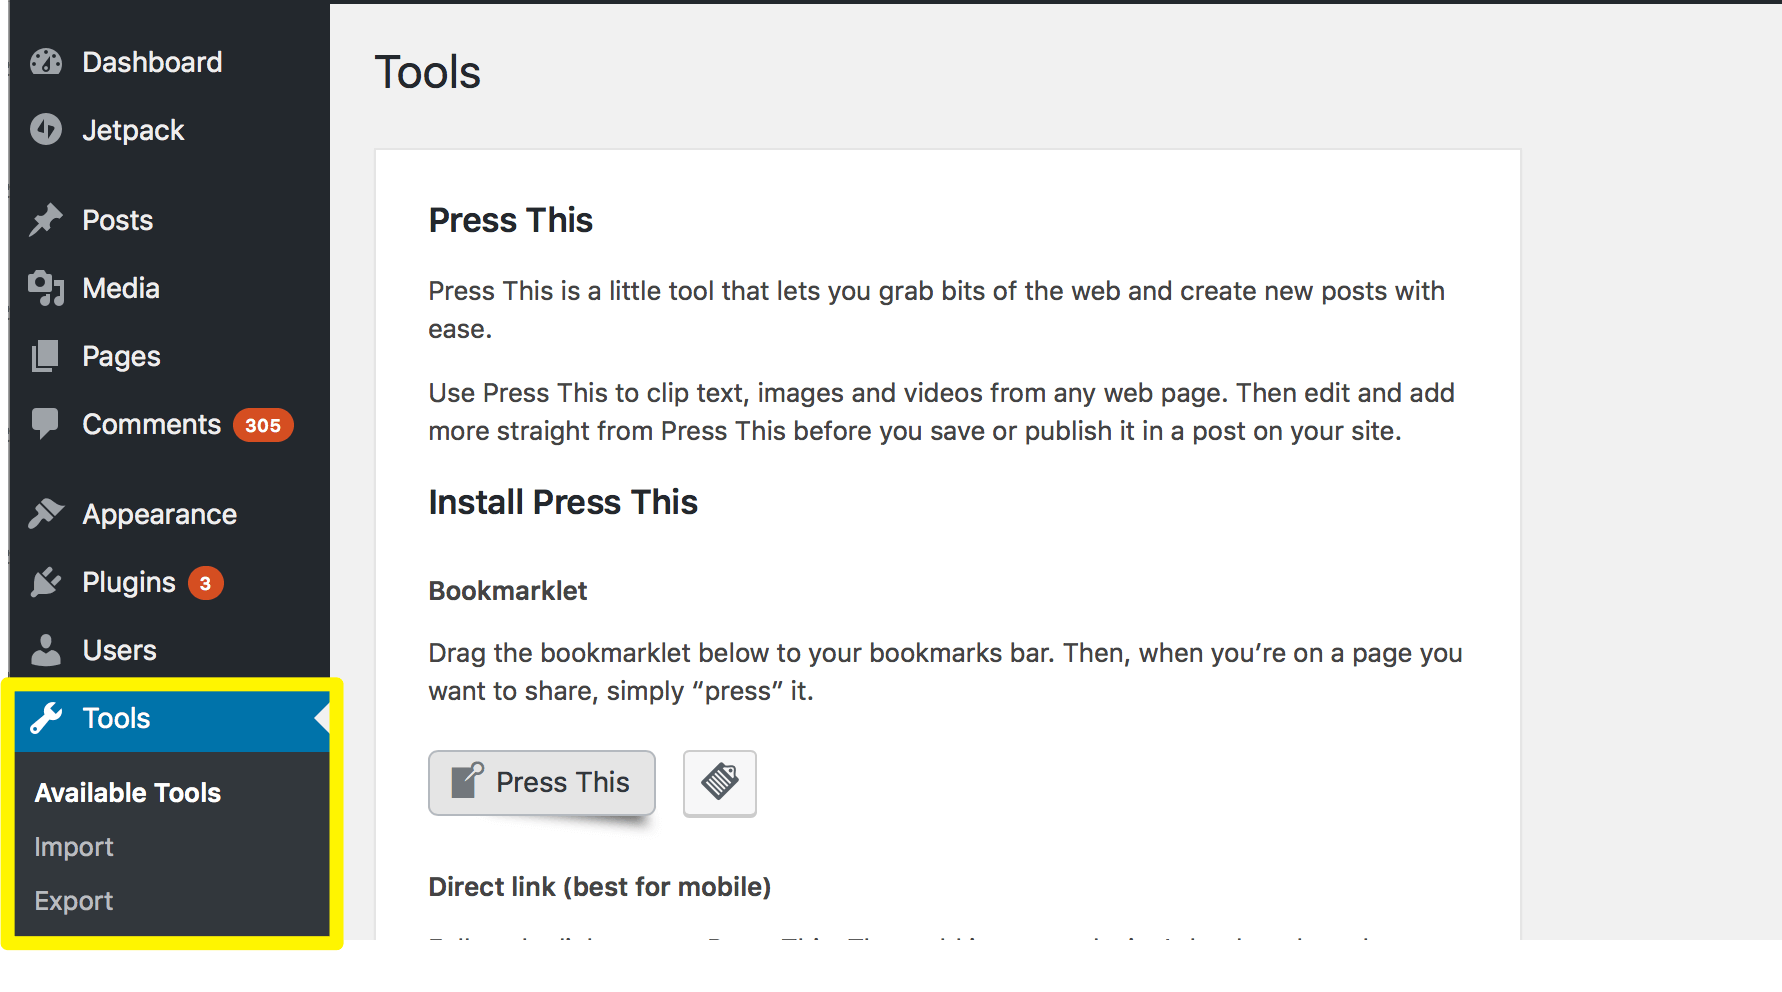
The WordPress Tools tab offers several management options, such as the ability to mass import posts and comments from another platform. By default, WordPress enables you to import content from the following platforms:
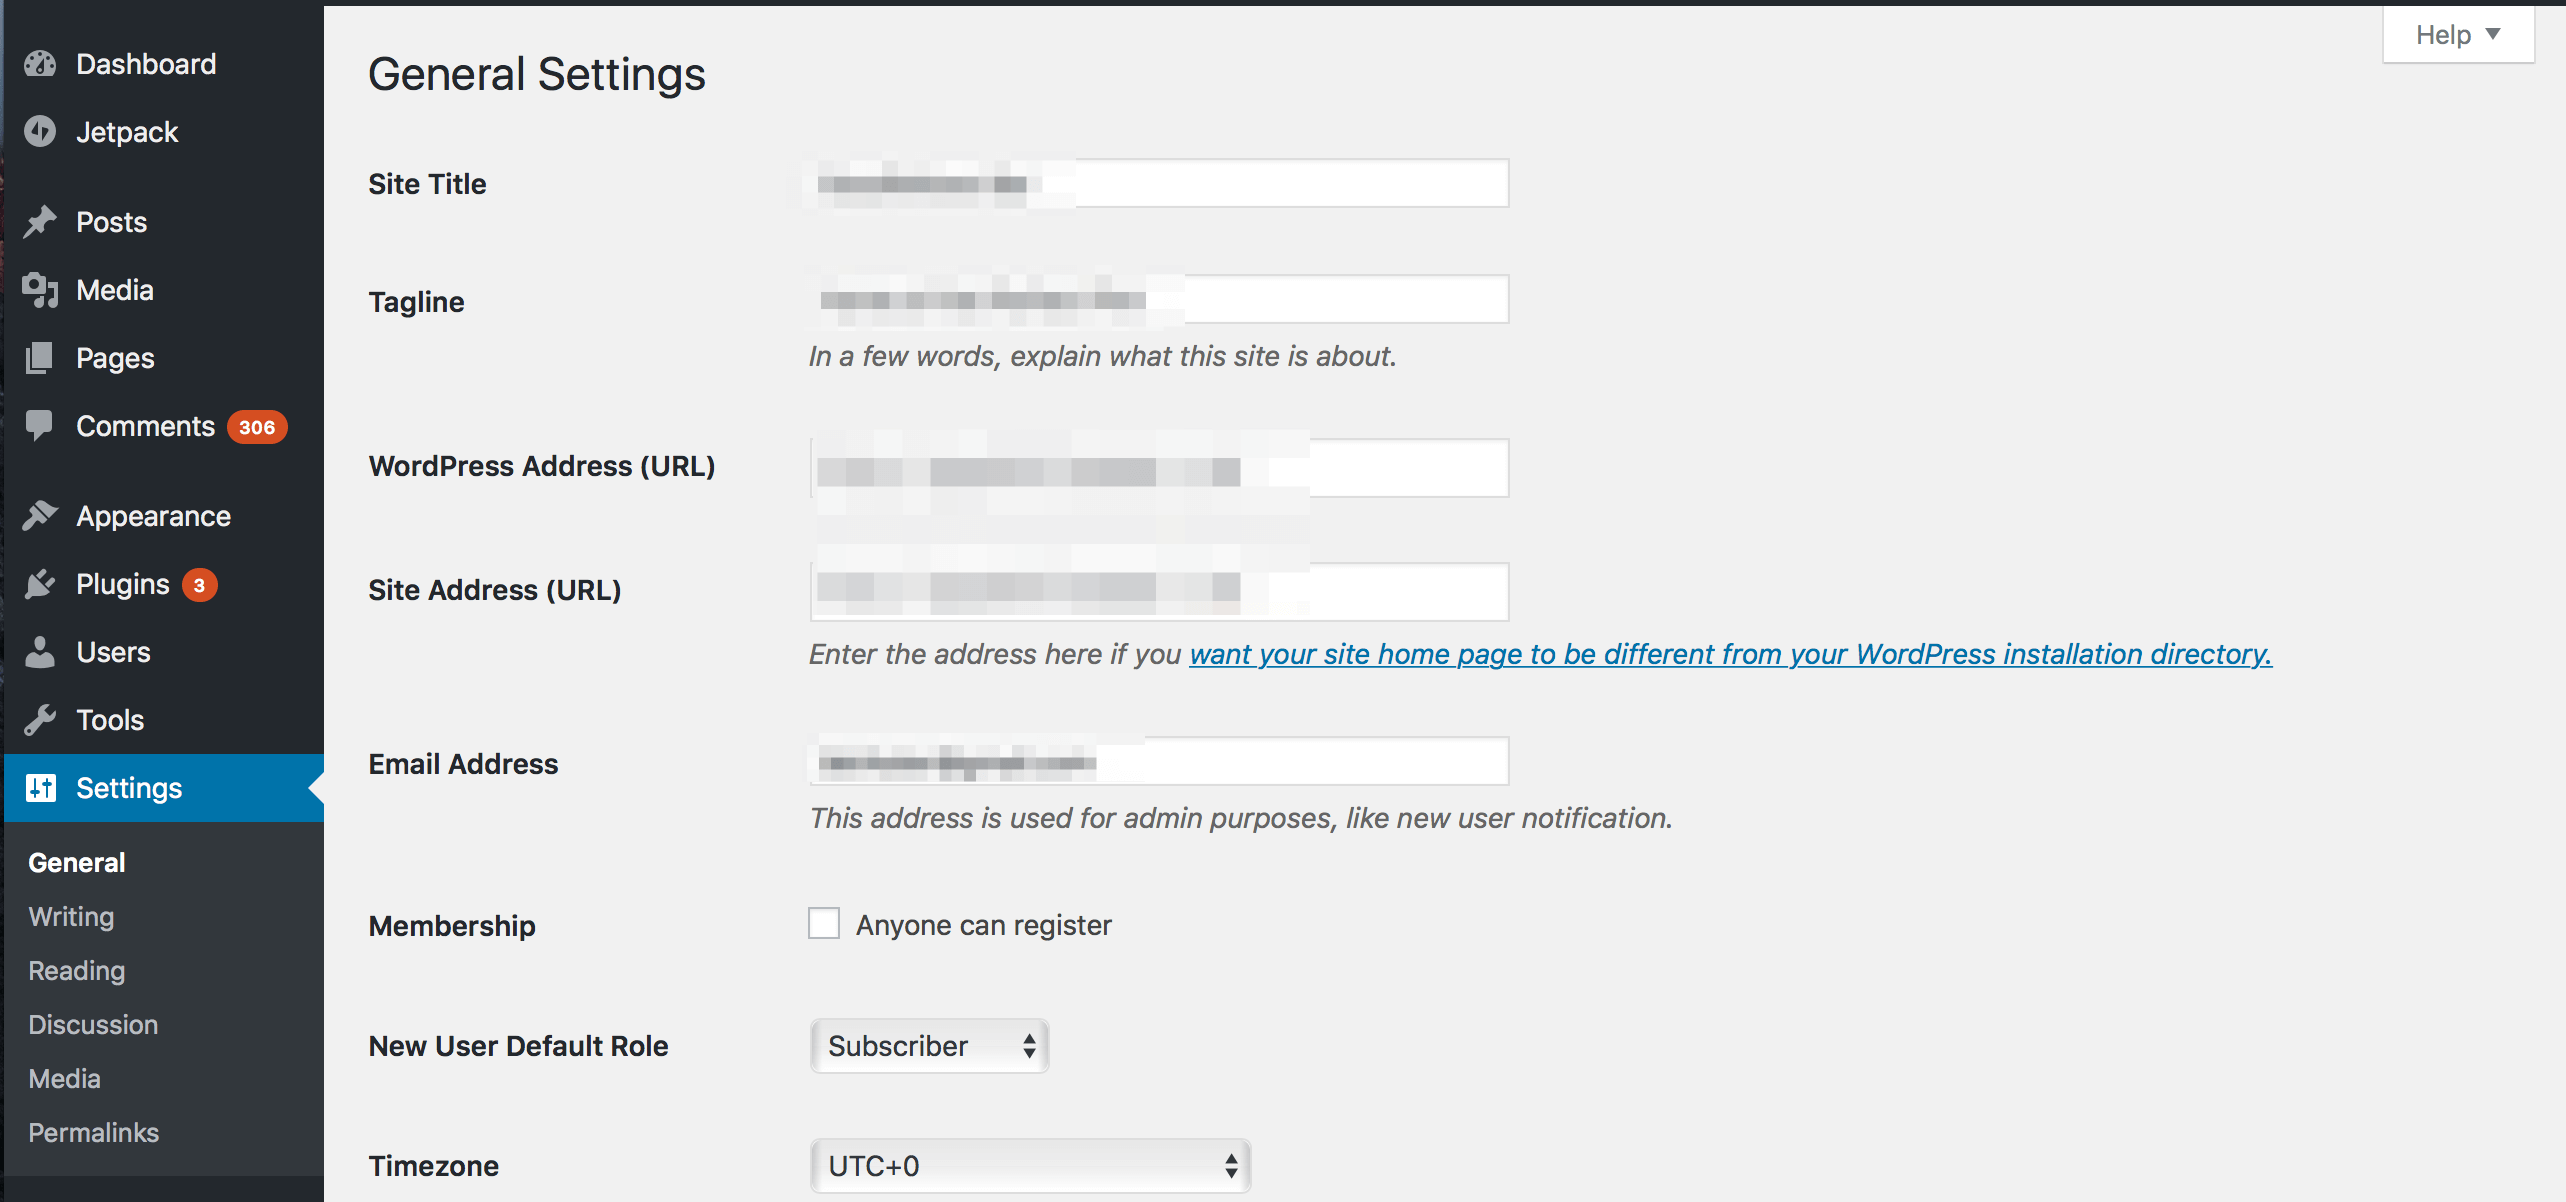
Think about the Settings tab as your primary site-wide configuration panel. It enables you to change your site’s title, site address, language, date display options, and even your administrator email.
Additionally, the Settings panel enables you to toggle user registration on and off, as well as set a default role for new users. WordPress usually sets new users as Subscribers, which means they can view content, and edit their own profiles, but don’t have any additional permissions.
In short, all you need to know to get your WordPress career off to a solid start is this:
While the dashboard may appear complex at first, things get less intimidating once you get to know its main components. Additionally, studying each widget area and sidebar tab individually will get you a long way towards understanding the platform.
In this guide, we’re going to deconstruct each section of the WordPress dashboard and arm you with the knowledge necessary to master the CMS. Let’s take it from the top!
What is the WordPress Dashboard?
Simply put, the WordPress dashboard is where all the magic happens. Think about it as the command center for your website. It enables you to write new posts, add pages, and customize the look and feel of your site, among several other functions. We’re going to take you through them all, step by step.Before we dive in, please note this tutorial and all screenshots within were taken from WordPress version 4.7, released on December 6, 2016. If you’re reading this somewhere down the line, some sections might have changed in the meantime.
What Do I Need to Know About the Main Dashboard Area?
Upon logging into WordPress, you’ll find that your dashboard is full of widgets, boxes, menus, and tabs. These elements are divided into two distinct “zones” – the main dashboard area in the center of the screen, and the sidebar to the left. Let’s go over the main area first.
This area takes up the most real estate by far, and it’s made up of several widgets offering different features. The first is the Welcome widget.
The Welcome Widget
The Welcome widget is located at the top of the main dashboard area. It invites you to jump right into blogging, with direct links to create your first blog post, add an About page, or preview your site. This section also includes links to a WordPress tutorial for newcomers, toggling comments on or off, and customizing your widgets and menus.
The Quick Draft Widget
The Quick Draft widget delivers exactly what its name implies – it enables you to get a new post started right away. It can be useful if you’re ever in need of firing off a quick update, but it lacks all the advanced functionality of the WordPress editor, so we wouldn’t recommend using it for a full-fledged post.
The At a Glance Widget
If you want a bite-sized summary of your most relevant blog stats, the At a Glance widget is the perfect solution. This section displays the number of posts you’ve published, how many pages your site has, the number of overall comments, and how many are waiting for your approval.
The WordPress News Widget
True to its name, the WordPress News widget rounds up links to the latest developments for the CMS. It’s the perfect way to stay on top of the most recent events concerning the platform.
The Activity Widget
The Activity widget displays the most recent activity from you, all members of your staff, and any visitors. By default, the Activity widget will show your website’s most recent posts and any new comments within.
Custom Dashboard Widgets
WordPress doesn’t limit you to only its default widgets on your dashboard – if you have some experience with web development, you can customize it as you see fit. Some plugins will also add their own widgets to the dashboard after activation (if you aren’t familiar with WordPress plugins, we’ll cover them in a minute).What Do I Need to Know About the Sidebar?
Now that we’ve covered the main dashboard screen, let’s talk about the navigation sidebar, which runs vertically down the left side of your screen. The sidebar is home to the bulk of your WordPress website’s functionality, with individual tabs for each major feature. Let’s go through them one by one.The Posts, Media, Pages, and Comments Tabs
The Posts, Media, Pages, and Comments tabs cover some of WordPress’ most critical features, and you can find all of them at the top of the sidebar. Each of these tabs is fairly self-explanatory. For example, you can click Post to see a listing of all your existing pieces and add new ones – same for Pages.
What’s the difference between a post and a page, you ask? Simple. Posts are meant to come and go, disappearing off your site’s homepage as they grow older and are replaced with fresh content. Conversely, pages are permanent features of your website. For example, this piece was created using WordPress’ Posts tab, whereas the Themes link at the top of your screen will take you to a permanent page. (The above isn’t a complete definition, but certainly good enough to be getting started with.)
Finally, we arrive at the Comments and Media tabs. The Comments section enables you to oversee and moderate user comments, while the media tab leads to a library of all your content, including photos, video, and audio.
The Appearance Tab
The Appearance tab leads to a menu that enables you to manipulate the look of your WordPress site through several features. First of all, you can switch between WordPress themes here, most of which can have an enormous impact on both your site’s style and functionality. The Appearance panel enables the discovery, activation, and customization of both free and premium themes. If you want to learn more about how to add and use themes, check out this excellent tutorial.
Furthermore, the Appearance tab also enables you to edit your website’s main menu, and add new widgets to your pages.
The Plugins Tab
To put it simply, plugins are tools that extend WordPress’ functionality. This tab enables you to add, delete, activate, and deactivate them as you will.
WordPress was designed to be lean and mean out of the box, which is what makes plugins so useful. It’s a modular system that enables you to enhance your site in any way you see fit, from compressing images, to improving Search Engine Optimization (SEO). If you’re not sure where to start looking for plugins, check out WordPress’ official repository.
The Users Tab
This WordPress tab enables you to manage existing users and add new ones. Subscriber, Contributor, Author, Editor, and Administrator user roles are included by default and can be granted to anyone at your discretion.
Bear in mind that any additional administrators (aside from you) will have full access to all the site’s features, so think it over carefully before assigning this role to any user!
The Tools Tab
The WordPress Tools tab offers several management options, such as the ability to mass import posts and comments from another platform. By default, WordPress enables you to import content from the following platforms:
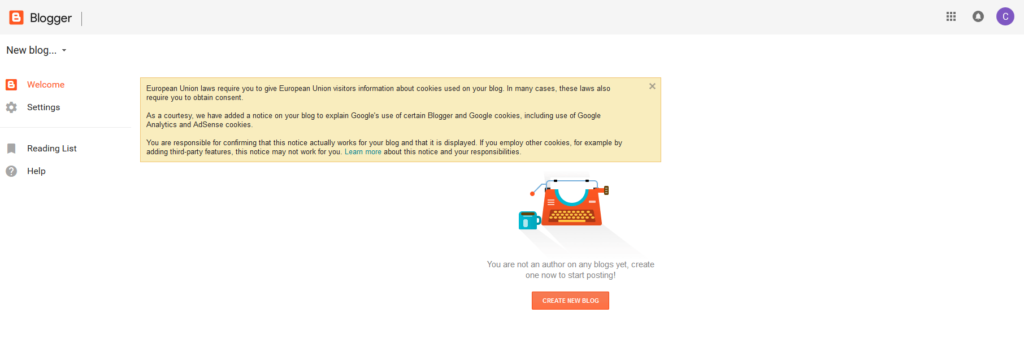
- Blogger
- LiveJournal
- Tumblr
- RSS
- Other WordPress sites.
The Settings Tab
Think about the Settings tab as your primary site-wide configuration panel. It enables you to change your site’s title, site address, language, date display options, and even your administrator email.
Additionally, the Settings panel enables you to toggle user registration on and off, as well as set a default role for new users. WordPress usually sets new users as Subscribers, which means they can view content, and edit their own profiles, but don’t have any additional permissions.
Conclusion
The extensive range of options available within the WordPress dashboard can be daunting at first. However, learning how to use the platform doesn’t have to be complicated. In fact, the dashboard’s straightforward layout enables you to tackle critical tasks without the need for a lengthy introduction.In short, all you need to know to get your WordPress career off to a solid start is this:
- Learn what the WordPress dashboard is and what its main sections are.
- Become familiar with the main dashboard widgets.
- Go over the dashboard’s sidebar, which covers the platform’s core functionality.